 3G Eden
 RSS
RSS
介绍搜索是各种应用程序的一个基本功能需求. 在我们的案例中,我们拥有一个餐厅的应用程序,需要它能让用户可以方便和快速的搜索菜品清单,找到他们想要的东西. 在本文中,我将会描述我在对UI进行持续的维护时先我们现有的餐厅应用程序加入本地搜索功能过程. 我会详细讲述我选择的UI方案及其理由, 此外还涉及到像activity中加入一个GestureOverlayView.
图 1: 餐厅应用程序的搜索视图截图 |
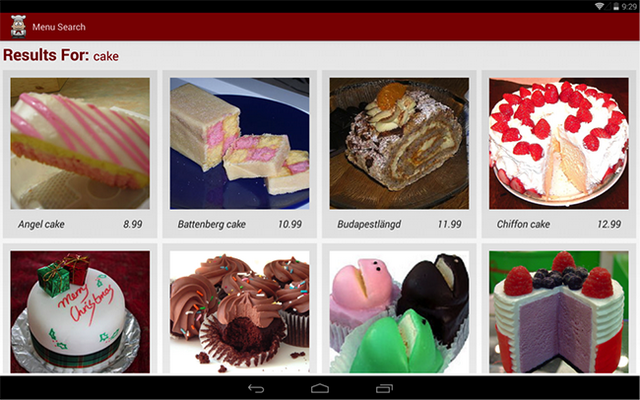
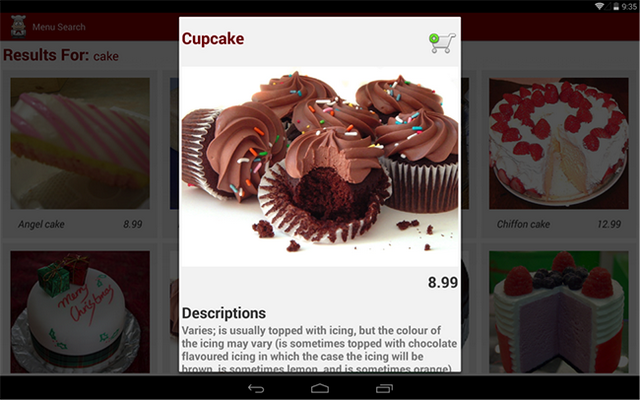
搜索对于搜索这个功能,在我们开始编写代码之前还需要做诸多设计上面的考虑. 你想要搜索的都是些什么东西? 我们想要为用户对标题和描述一并进行搜索,以获得做大的结果集,而这是因为标题并不总是会告知这份菜品实际是什么样子的. 此外你还可以增加一些针对每个菜品的隐藏元数据的搜索. 而对于搜索activity的布局,你像让搜索结果集如何显示出来呢? 一开始我是用一个列表视图来展示结果集,就像购物车视图的activity. 然后,这样的话菜品看上去就并不会吸引人来在上面点击,因为图片很小,而当我让图片变得更大的时候,页面上能够一屏展示的结果集就少了. 因此我决定把菜品清单的主题部分显示方案锁定在了网格视图上, 但不去在一侧显示一个更大的详细视图,而是会让网格视图占据屏幕的整个显示空间,使其能很容易的不同于一般的菜品清单. 现在为了查询单项的详细视图,用户要用手机单击一项,然后它就会以一个浮动在界面之上的对话式的fragment显示出来 (见图 2). 那样用户就可以快速的在其它地方单击以关闭这一项,然后在另外一项上面单击查看另外的这一项. 搜索运行起来需要快速而且流畅,对于用户而言,他们想要尽可能快的找到他们想要的信息,否则他们可能不会找到某一项,而沮丧的离开. 最后的问题是我们准备如何处理用户隐私? 我们可以设计一个能基于近期搜索行为提供搜索建议的搜索功能,或者是一个需要输入用户私人信息的搜索功能. 这可能会带来有关其他人可能会看到你要搜索的是什么,以及你的私人信息会流向哪里,这样的担忧. 不过在我们的案例中,因为只是是一个餐厅的应用程序,所以你大可不必因为人们会知道你喜欢吃什么派而担忧,而又写应用程序是需要你慎重考虑一下用户隐私的. 对于我们的应用程序,不需要任何私人的信息, 也不会将任何的搜索项记录日志,而且没有搜索项的历史记录. |
|
在我们的餐厅应用程序中实现这个功能,第一步要做的就是到我们的数据库类中添加一个方法,以构建一张存储待展示搜索结果的新表. 你可以从这儿了解到更多有关餐厅的数据库设置: 在你的Android应用中使用数据库. 使用一条 SQLite 查询,我们就能够只用几行代码轻松的查询数据库找到我们需要的数据项. 这里我们搜索的是任何包含有搜索项或者其后跟着有另外的文本的名称或者描述的内容. 我们也会返回所有的列,因为我们将会在详细视图中展示这些信息. 注意如果你的数据库很大,查询的时候就可能会有延迟,而你就会想要在查询过程中向用户显示一个进度条或者转动圆环这样的东西.
代码示例 1: 查询数据库的方法 |
|
接下来,我们需要在主activity的操作栏中设置上搜索选项. 更多有关设置操作栏的信息可以阅读这篇文章: 为 Android 设备构建动态UI. 搜索功能的处理将完全在我们的应用程序里面; 我们并不想要在搜索一开始的时候列出已经安装在设备上的应用程序清单,或者发送一个intent来让另外一个搜索应用程序来进行处理. 向 MainActivity 类添加如下这个字符串变量. 我们会使用这个变量来向搜索的intent发送所要查询的字符串:
代码示例 2: 向搜索intent中添加扩展数据的类变量 更新 MainActivity 的 onCreateOptionsMenu 方法:
代码示例 3: 操作栏初始化代码 以及 SearchResultsActivity 类:
代码示例 4: 主要的搜索结果类 (下面还会有) |
|
当我们构建这个列表是,我们也将会处理没有查询到任何匹配项的情况下应该怎么做. 如果没有匹配,我们会查搜索的人显示一个消息对话框,让他们知晓,并且关闭搜索的activity,他们就不会看到一个空白的界面了.
代码示例 4 续 类的这一个部分是网格视图的适配器, 这里我们能够只做相对很小的修改实现对来自主菜单代码本身的重用. 我们也能够适配布局文件,因此保持UI在视觉上的一致性具有无需重头开始,只要轻松的对代码进行回收利用这中好处. 你之前可能已经意识到了,我也重用了 OrderViewDialogue, 这事我志气啊为购物车写的一个类,但是在这里也能起作用.
代码示例 4 续 |
|
需要在布局上考虑的另外一个问题就是屏幕的横向和纵向模式. 底下是 res/layout-land 目录中的 search_query_grid_results.xml 文件. 你可以从这儿发现 numColumns 被设置成了4, 除了这个值是2以外, res/layout-port 文件跟这个文件是一样的.
代码示例 5: 搜索视图的横向布局xml
图 2: 当用户点击时单项的详细视图 |
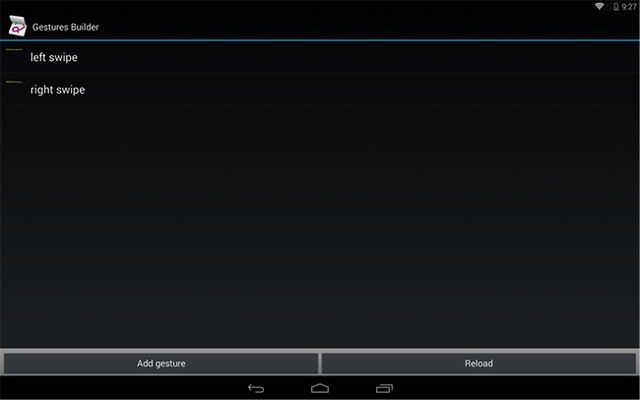
手势覆盖层(Gesture Overlay)
|
|
你的文件一就位,用下面的代码修改 SearchResultsActivity 类:
代码示例 6 : GestureOverlayView 的变量声明 在 onCreate 方法中, 初始化视图,加载库文件,并设置当用户执行一个匹配的手势时要做什么的侦听器. 确保能匹配到你在库文件中创建的名称. 动画我们则准备在 overridePendingTransition 调用时执行它. 对于进入动画我们指定值为0,也就是没有动画。你可以创建一个空的动画XML文件,并且引用它, 但是会有相当大概率的次数中,系统会弄糊涂,输出的动画执行起来会非常快.
代码示例 7: 在onCreate方法中初始化 GestureOverlayView |
|
下面是动画文件 move_left.xml: (除了toXDelta是正数之外 move_right.xml 跟 move_left.xml是一样的)
代码示例 8: 向左移动动画的代码 注意当用在一个GestureOverlayView里面的时候,你的网格视图不能有一个0dp的layout_height值, 因为将真的只是0dp,而不是像我们想要的那样在一个线性布局中扩展开. 为了在我们的案例中适应这种情况,我们将layout_height设置成fill_parent. 我们有不想要我们的手势可见,并且我也不想有等待可见的手势渐变消失这种延时, 因此你会需要将 fadeOffset 和 fadeDuration 设置成 0.
代码示例 9: 得到用于布局 xml 的 GestureOverlayView 的更新的 GridView 块 |
总结
|
本文转自:开源中国社区 [http://www.oschina.net]
本文标题:为你的 Android 应用增加本地搜索功能
本文地址:http://www.oschina.net/translate/adding-local-search-functionality-to-your-androi
参与翻译:LeoXu
英文原文:Adding Local Search Functionality to Your Android* Application